RECIPE FOR HOMEMADE PANCETTA |
|

You may ask - what is the difference between pancetta and bacon? Both can come from the pork belly, but bacon typically is wet brined or injected and pancetta lends itself better to a dry cure with aromatics.
There is something very satisfying about whipping up a quick meal with your pancetta to hand. I like to fry up some lardons (small chunks of diced up pancetta), cooked up in a pan and then add some fresh cooked pasta and peas in, then all tossed in the natural fat. Takes minutes to cook. In one bowl with a fork. The number of late nights due to work and not wanting the hassle of cooking for ages when I all i want is some good grub and bit of TV.
There is something very satisfying about whipping up a quick meal with your pancetta to hand. I like to fry up some lardons (small chunks of diced up pancetta), cooked up in a pan and then add some fresh cooked pasta and peas in, then all tossed in the natural fat. Takes minutes to cook. In one bowl with a fork. The number of late nights due to work and not wanting the hassle of cooking for ages when I all i want is some good grub and bit of TV.

This is a very simple recipe for anyone not knowing much about curing meats and can be used in all your favourite recipes calling for pancetta like carbonara, bolognese, or a cracking bucatinini all'amatriciana.
But one of the real beauties of this base recipe is you can add other aromatics and can use this in other recipes that calls for pancetta or bacon. I love throwing it in some soups and chicken casseroles. Why not try with other herbs and spices like sprigs of rosemary, coriander seeds or fennel seeds. This recipe is a wet brine in its own juices and the time in the brine gives time for the aromatics to permeate the meat.
But one of the real beauties of this base recipe is you can add other aromatics and can use this in other recipes that calls for pancetta or bacon. I love throwing it in some soups and chicken casseroles. Why not try with other herbs and spices like sprigs of rosemary, coriander seeds or fennel seeds. This recipe is a wet brine in its own juices and the time in the brine gives time for the aromatics to permeate the meat.
INGREDIENTS
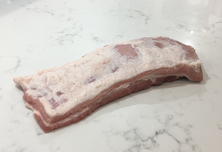
- One large cut of pork belly, big enough that when the skin is removed will be rollable in one direction.
- Craft Cookhouse Basic Dry Cure (see recipe here)
- Nutmeg
- Few springs of fresh thyme (Optional)
- Crushed Garlic (Optional)
- Some coarse ground black pepper
- Ziplock bag / sealable food bag big enough to contain your pork belly
- Some string ( I recommend Butchers String)
- White or red wine vinegar
|
INSTRUCTIONS
|
|
|
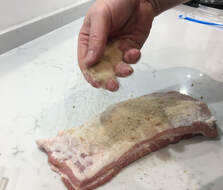
Now, weigh your pork belly - you will be looking to add 5% of the weight in salt, and since our Basic Dry Cure is a 50/50 mix of salt and sugar you will want 10% of the weight in dry cure. Sprinkle the cure over your pork belly.
Make a note of the weight as this will also dictate how long the belly will cure for. |
|
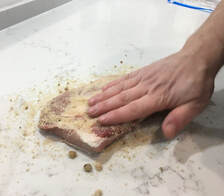
Rub the cure all over the belly, including the sides.
|
|
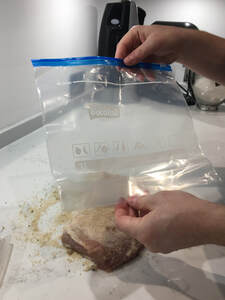
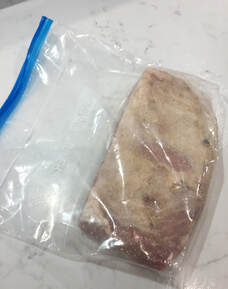
Put in the sealable bag with some springs of thyme, the crushed garlic and some course ground black pepper and any left over dry cure.
|
|
Put the bag in the fridge.
It is important to note that when you first try this it is better to under cure the meat rather than over cure it and make it too salty for your taste buds. After a day you will see a natural brine forming as the natural water is drawn from the belly. This is now a natural wet cure. It is going to stay in the bag for 1 day per 500g in weight of the meat - rounded up. So if your meat was 1300g you will leave it for 72 hours (3 days). Give the meat a massage in the bag and turn it over couple of times a day just so that the meat has the opportunity to engage with the natural brine as much as possible. |
|
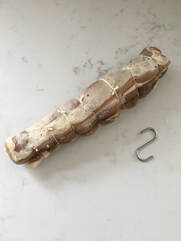
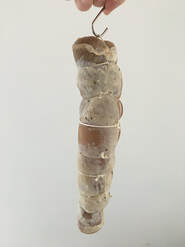
AFTER 1-4 DAYS IN THE FRIDGE (Depending upon the weight)
|
|
|
|