HOMEMADE STREAKY BACON RECIPE |
|
When I was growing up and mum would cook up bacon on a sunday morning I always remember bacon having the rind on. This would crisp up under the grill adding another texture to the bacon. This recipe brings that back.
If you look on the back of shop bought bacon you will see the % of Pork and the % of Water. Water?! There should be no injected water in your meat! When you cook it this water seeps out into a horrid white foam and residue reminiscent of a 90's foam party, and the bacon miraculously shrinks to half the size. If you look at the ingredients you will also see dextrose, antioxidants, sodium ascorbate, sodium nitrite, potassium nitrate....This recipe has no artificial additives, no unnecessary unnatural preservatives.
If you look on the back of shop bought bacon you will see the % of Pork and the % of Water. Water?! There should be no injected water in your meat! When you cook it this water seeps out into a horrid white foam and residue reminiscent of a 90's foam party, and the bacon miraculously shrinks to half the size. If you look at the ingredients you will also see dextrose, antioxidants, sodium ascorbate, sodium nitrite, potassium nitrate....This recipe has no artificial additives, no unnecessary unnatural preservatives.
INGREDIENTS
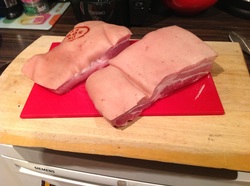
- Large cuts of Pork Belly
- Craft Cookhouse Basic Dry Cure (see recipe here)
- White wine vinegar or red wine vinegar
- Large cuts of Pork Belly
- Craft Cookhouse Basic Dry Cure (see recipe here)
- White wine vinegar or red wine vinegar
|
DAY 1
Wash your belly pork under running cold water and pat dry with a clean tea towel. |
|
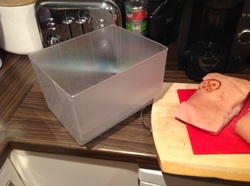
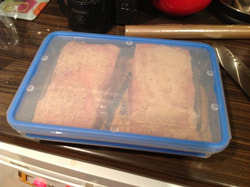
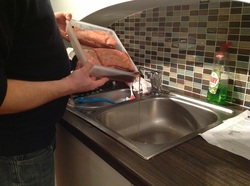
Cut your pork belly to fit in the food container or fridge drawer (these are brilliant if taken over for curing and assuming you've cleaned and dried it). This is now your meat curing chamber!
Try to trim the meat so you have no overhanging areas or flaps. This is important for later. You can use the offcuts in other cooking. |
|
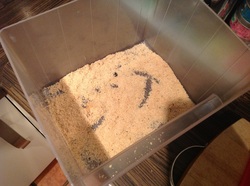
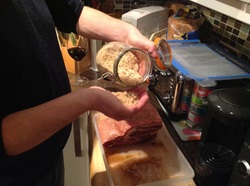
Scatter a small handful of the dry bacon cure (see CHARCUTERIE RECIPES above) over the base of the fridge drawer (or food storage container). The base does NOT need to covered in a thick blanket at all.
|
|
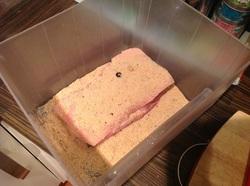
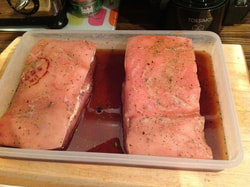
Put your belly pork on top of the first layer of dry cure and scatter a small handful over the top and gently rub in.
|
|
If doing 2 or 3 pieces, just repeat the process of layer cure and meat and gently rubbing the cure into the meat.
Alternatively if there is room just put side by side and sprinkle with the cure and give a gentle rubbing in. |
|
Cover with cling film and put in fridge.
|
|
Or if using food storage, cover and put in fridge
|
NOW STARTS THE CURING PROCESS
|
DAY 2
On day 2 you will see liquid in your container or fridge curing drawer that has leached from your meat, this is the salt in the cure drawing it out. This is all part of the curing process so don't be alarmed. |
|
Remove the bellies or hold them aside and pour away this salty liquid.
There will be some cure left stuck to the bottom. Leave this there. |
|
Take your dry bacon cure and sprinkle another handful on the base, re-stack your bellies (moving bottom one to the top) giving them a sprinkling of the cure between the layers and on top. You are looking to rotate and flip the sides so that each side has ample time in the dry cure.
Recover with clingfim / reseal food container and place back in fridge. |
REPEAT THE PROCESS FOR ANOTHER 3 DAYS (4 DAYS IN TOTAL)
|
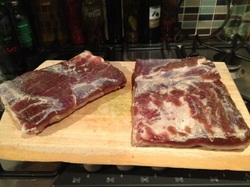
On DAY 4, remove the meat and wash gently under running water. You are looking to gently wash off any residual salt and sugar granules here, no need to get overly obsessive with scrubbing any other parts of the cure off.
Pat dry with clean tea towel. Now take your white wine vinegar and with a pastry brush or clean cloth wipe the meat over on all sides with the vinegar. You can cure it for longer (up to a couple of weeks) repeating the process and it will keep for longer. It will also become much saltier in taste. |
|
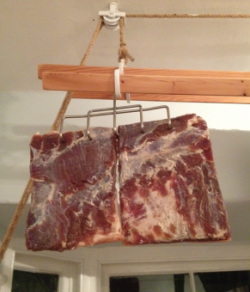
Now hang your bellies using either a meat comb (pictured) or a meat hook, or tie up with some butchers string. I've even used old metal coat hangers before (sterilise before use by boiling in a pan of water). Please see my TIPS on hanging your meat.
Leave this to hang for 3-5 days, in a cool area, out of direct sunlight, where there is some air movement, and not touching anything. I hang mine in the kitchen near the back door. See TIPS for more tips on hanging your meat. You may be fearful of flies during the summer etc but if you have trimmed your meat and left no crevices or flaps then you should be fine. Check it daily. If you do happen to see any fly eggs, don't worry, you can wash them off with white wine vinegar. This acts as a natural disinfectant and is antibacterial and doesn't harm the meat. Don't be squeamish about leaving it out of the fridge. The secret is to find a cool area out of direct sunlight. Bacon was being made back in 1500BC. Refrigeration, as we know it was only invented in 1805 and wasn't widespread till the late 1940's. Before then meat would be stored in cool dark places or meat cabinets, and curing or smoking meat would act as a way of preserving it. |
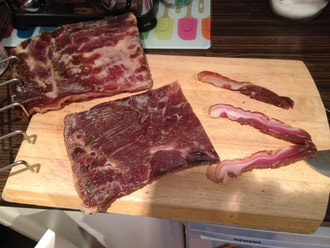
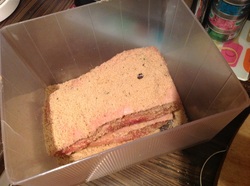
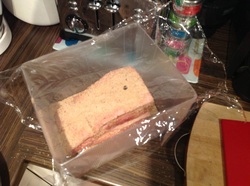
Your bacon is now ready for eating. It will be firm, free from additives and chemicals, and have no injected water.
|
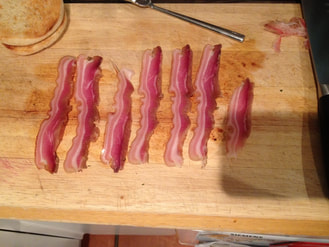
Triumphantly slice as much as you need per serving either by hand or with a food slicer.
|
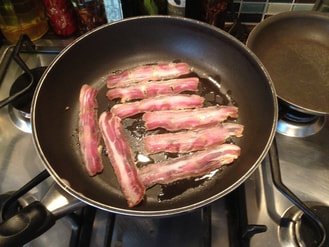
Be prepared for the best bacon you have ever tasted. It will cook quickly and will not throw out water and white foam like water injected bacon.
|
STORING YOUR STEAKY BACON
Your bacon is now traditionally cured. If the weather is cool it can continue to be hung or it can stored in the fridge and you can take slices as you need them. Because of the traditional curing the bacon will last weeks. The longer the curing in the dry cure at the start the longer the bacon will last, but at the same time will become saltier.
If you happen to find your bacon too salty for your palate, simply soak the belly in clean cold water for 4-8 hours, dry and rehang.
Next time use slightly less cure (or use smaller handfuls!). You will soon get an eye for how much cure to meat you are using and adapt based on the thickness of the cut of meat